Samsung refrigerator: Remove or install door and connect wiring harness

Samsung refrigerator: Remove or install door and connect wiring harness
Installing/Removing doors on side by side models
You can remove and reinstall the doors on a Samsung Side-by-Side refrigerator model using the instructions in our guide.
Required tools:
- Phillips screwdriver
- Flat-head screwdriver
- Socket spanner
- Allen wrench
Disconnect the water line (dispenser models only)
- From the bottom rear side of the fridge, pull out the water line.
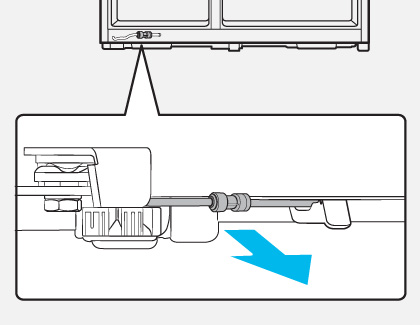
- To disconnect the hoses, press and hold the transparent coupler and detach the water hose. Do not apply excessive force to the coupler, as it may break.


Remove the doors
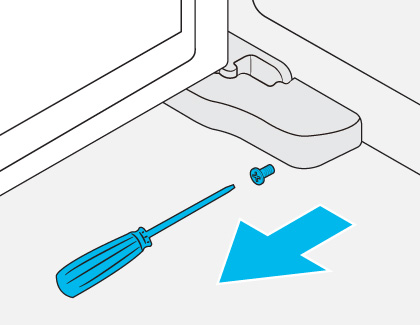
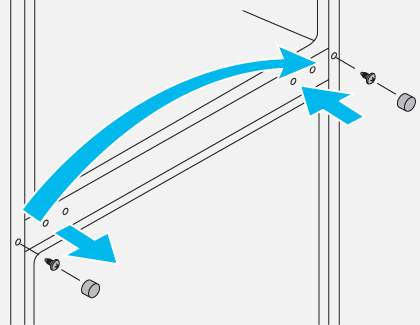
- Use a Phillips screwdriver to unscrew the hinge covers on the top of each door.
- Open the doors to loosen the hinges and then remove the hinge covers. Once the covers are removed, close the doors.
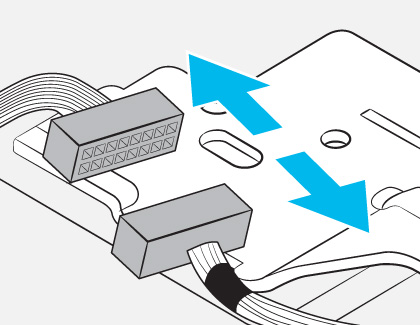
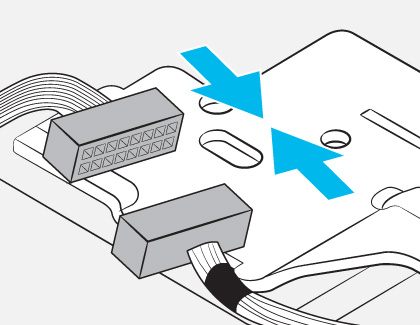
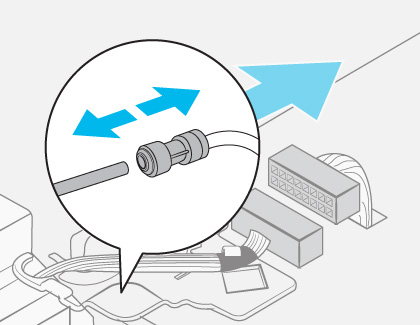
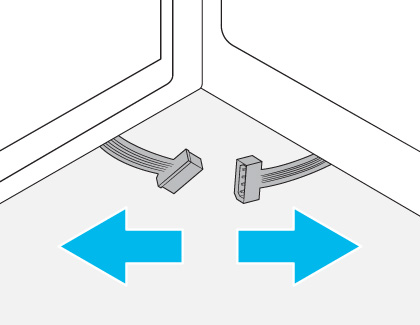
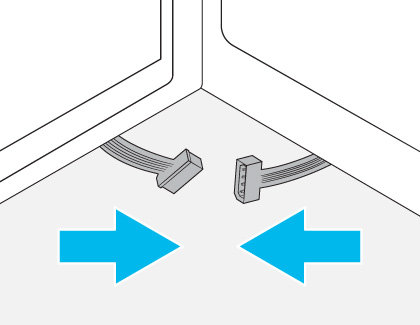
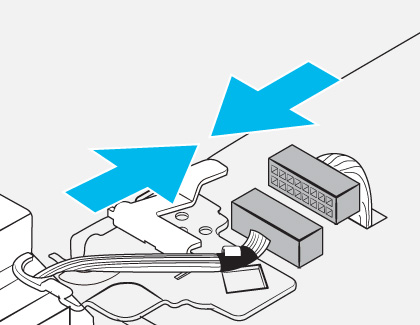
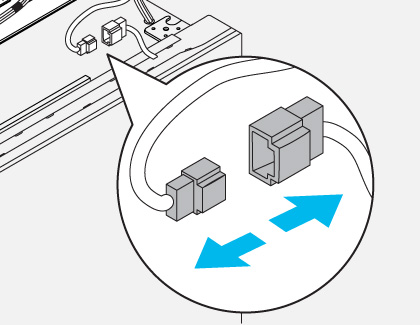
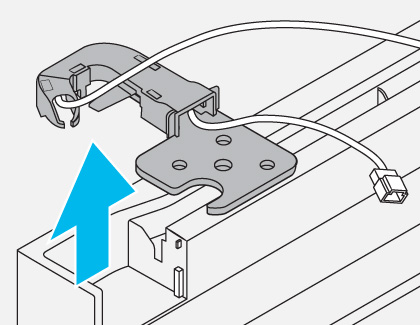
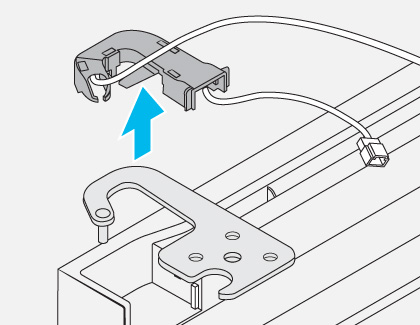
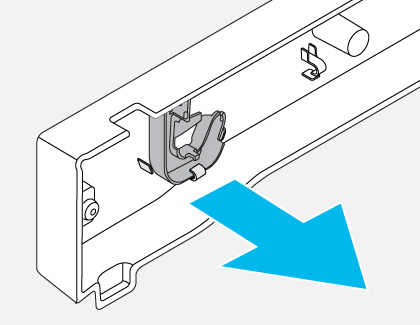
- Disconnect the electrical harness.
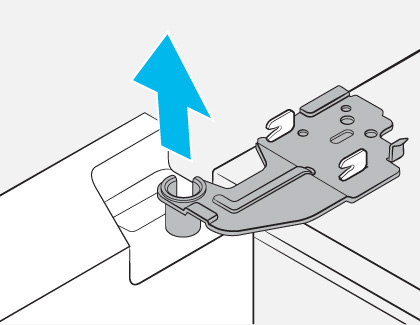
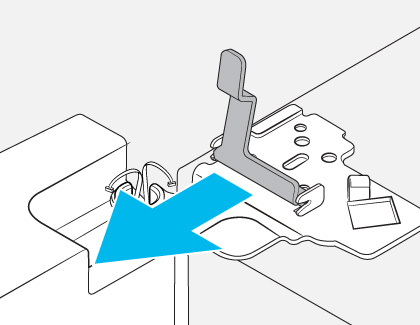
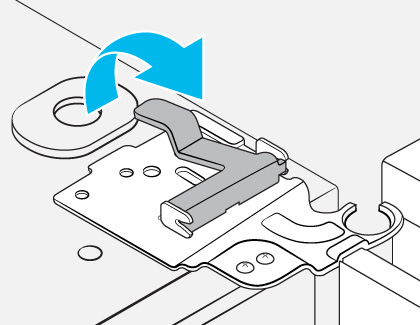
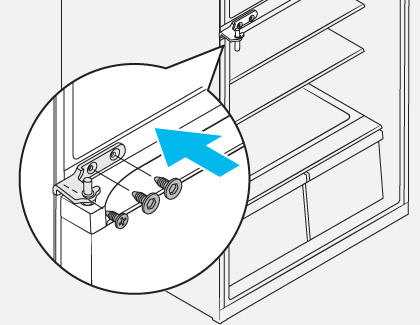
- Gently lift the clamp and pull it to remove it. Do not use excessive force.
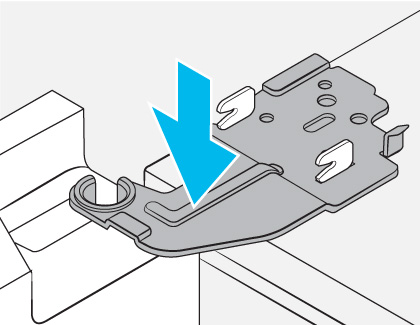
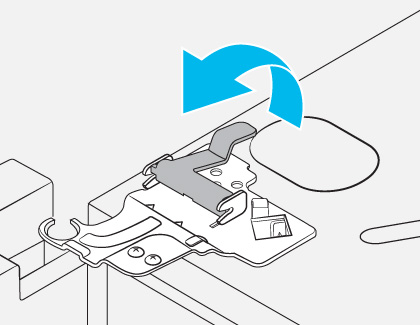
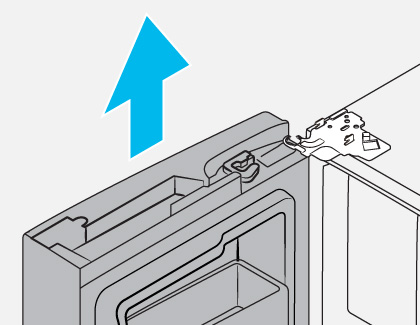
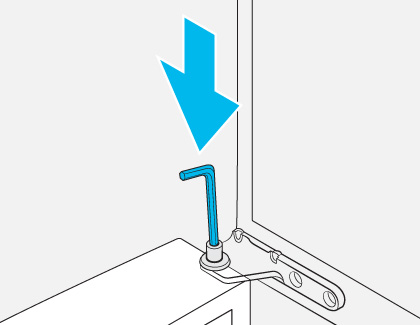
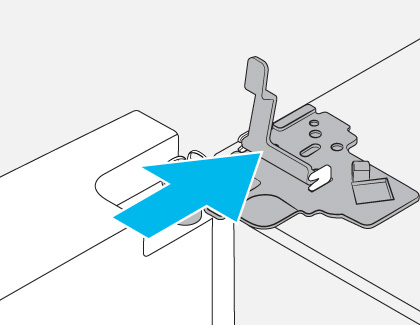
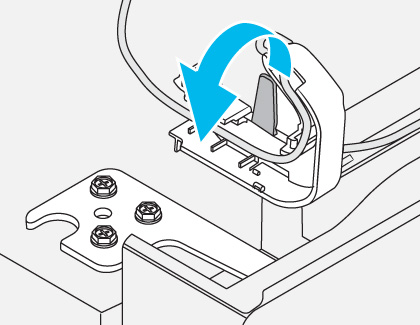
- Open the door by 90 degrees. While holding the door, remove the hinge.
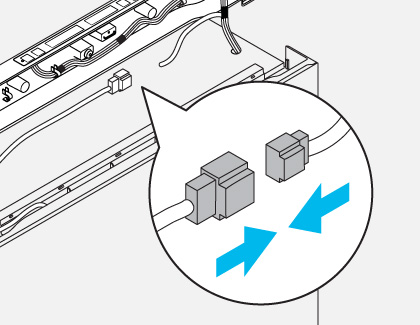
- Reconnect the water hoses (dispenser models only). Make sure the hoses are connected to their matching colors. Then, push the hoses under the cabinet and arrange them on the provided hook.


Reattach the doors
- Hold the freezer door and hook it onto the hinge at the bottom of the fridge.
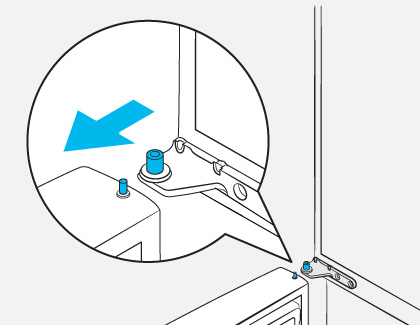
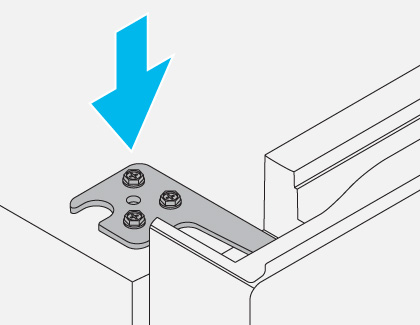
- Place the hinge into position, and then insert it into the hole on the door.
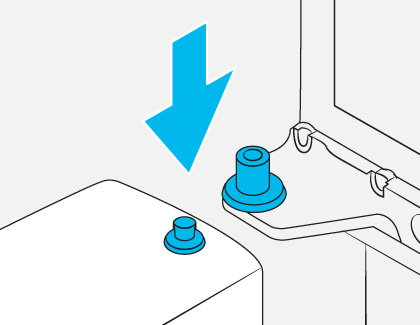
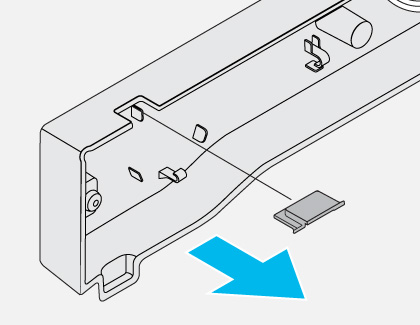
- Insert the clamp and then press down on the clamp.
- Connect the electrical harness.
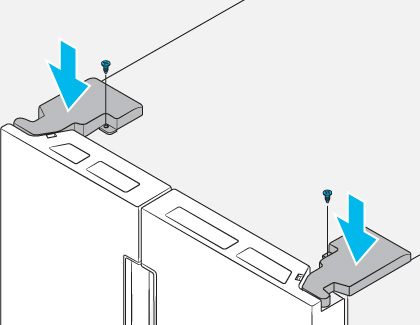
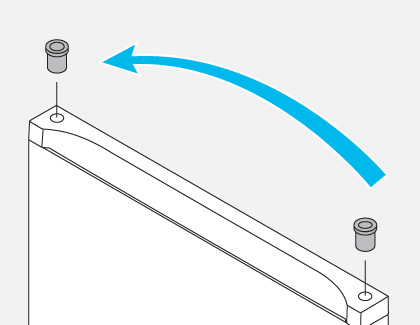
- Insert the hinge covers (with the front sides first), and then tighten the screws using a Phillips screwdriver.


Install/remove doors on 4-Door French Door models
You can remove and reinstall the doors on a Samsung 4-Door French Door refrigerator model using the instructions in our guide.
- The door may fall off or fall over and cause damage during any of these steps. To prevent an accident, use extreme caution when performing these steps.
- To prevent water leaks from the dispenser, the water line must be fully connected.
- Do not remove both doors simultaneously.
- Make sure the fridge has been turned off before disconnecting the connectors.
Required tools:
- Phillips screwdriver
- Flat-head screwdriver
- Socket spanner
- Allen wrench
- Pliers
Remove the left door
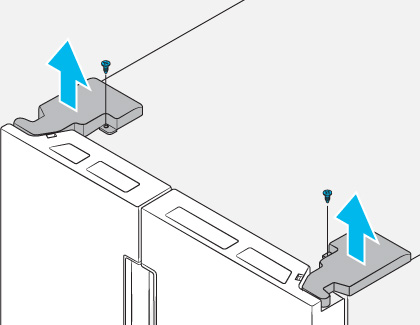
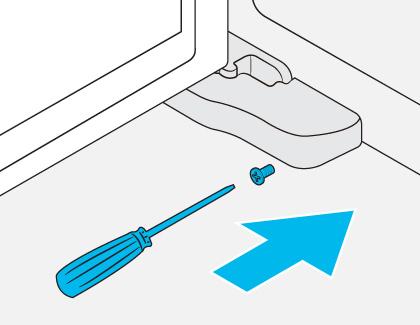
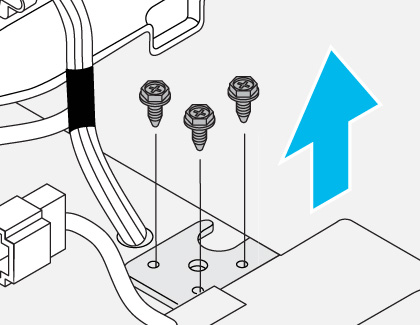
- With the doors closed, use a Phillips screwdriver to remove the screws on the top cover.
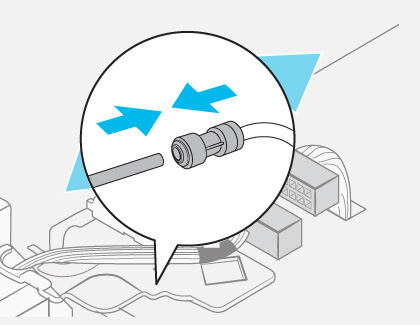
- Disconnect the wires and the water tube from the left door. First, decouple the connector, and then disconnect the water tube by holding down one end of the water line coupler.

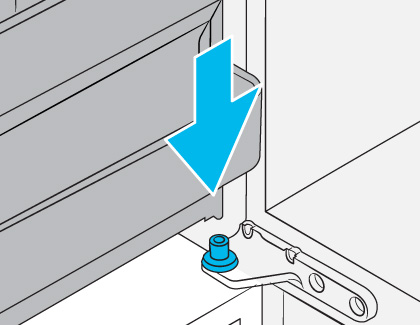
- Gently draw up the clamp and then pull it to remove it. Do not use excessive force.
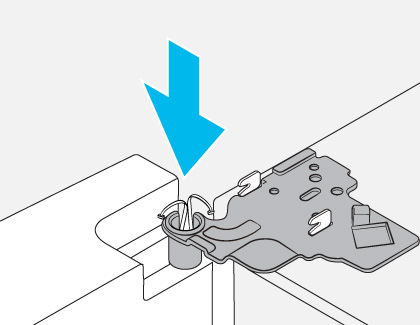
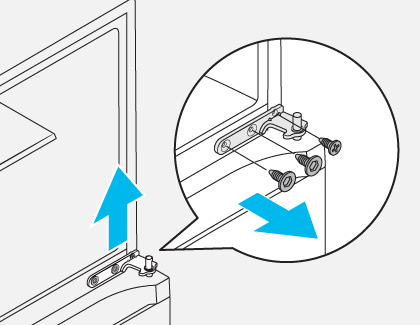
- Open the door by 90 degrees. While holding the door, pull up and remove the top hinge. Do not damage the wire connectors when removing the hinge.
- Gently pull up the door vertically to remove it.
- Lay the door down on a flat surface.


Remove the right door
- Disconnect the wire connectors on the right door (the position of the connectors may differ depending on the model).
- Gently draw up the clamp and then pull it to remove it. Do not use excessive force.
- Open the door by 90 degrees. While holding the door, pull up and remove the top hinge. Do not damage the wire connectors when removing the hinge.
- Gently pull up the door vertically to remove it.
- Lay the door down on a flat surface.
Reattach the doors
Follow the previous steps in reverse order to reattach both doors.
Install/remove doors on 4 Door Flex models
You can remove and reinstall the doors on a Samsung 4-Door Flex refrigerator model using the instructions in our guide.
- Do not remove both doors simultaneously.
- Make sure the fridge has been turned off before disconnecting the connectors.
- Before reattaching the doors, make sure all the electrical connectors are properly connected.
Required tools:
- Phillips screwdriver
- Flat-head screwdriver
- Socket spanner
- Allen wrench (4mm and 5mm)
- Pliers
Remove the fridge doors
- With the doors closed, use a Phillips screwdriver to remove the screws from the top cover. Pull up and remove the top cover with the connectors.
- Disconnect the two wire connectors from the left door (the position of the connectors may differ depending on the model).
- Disconnect the water tube from the coupler on the left door.
- Gently draw up the clamp and pull up the clamp to remove it. Do not use excessive force.
- Open the door by 90 degrees. While holding the door, pull up and remove the top hinge. Do not damage the connector wires while removing the hinge.
- Gently pull up the door vertically to remove it.
- Lay the door down on a flat surface.
- Repeat the above steps for the right door. You may skip Step 3, as there is no water tube on the right door.


Remove the freezer doors
- With the freezer door open, use a Phillips screwdriver to remove the screw holding the cover of the leveling leg.
- Disconnect the wire connectors.
- Locate the hinge shaft. While holding the door with one hand, use a flat-head screwdriver or wrench to press the shaft down. Make sure to hold the door to prevent it from falling.
- Slightly tilt the door to the front, and lift it up to remove it.
- Repeat the above steps for the other freezer door.


Reattach the freezer doors
- Insert the freezer door into the bottom hinge while pushing the door into position.
- While pressing the hinge shaft down, position the door so that the hinge shaft is below the shaft hole in the middle hinge. Release the hinge shaft so that it enters the shaft hole.
- With the door open, connect the bottom connectors.
- Attach the leveling leg cover using a Phillips screwdriver. Do not step on or damage the connectors.
- Repeat the above steps for the other door.


Reattach the fridge doors
- While holding the left door open by more than 90 degrees, insert the shaft on the middle hinge into the hole on the bottom of the door.
- Place the top hinge into position on the top of the fridge, and then insert the hinge shaft into the top hole of the door. Make sure the wires from the door pass through the hole in the hinge shaft.
- Insert the clamp and then push the clamp into position.
- Connect the wire connectors.
- Connect the water tube.
- Repeat the above steps for the right door. You may skip Step 5, as there is no water tube on the right door.
- Attach the top cover (with the front side first), and then press down on the back of the cover to get it into position. Tighten the screws.


Install/remove doors on 3 Door French models
You can remove and reinstall the doors on a Samsung 3-Door French Door refrigerator model using the instructions in our guide.
Required tools:
- Phillips screwdriver
- Flat-head screwdriver
- Socket spanner
- Allen wrench
- Pliers
Remove the left fridge door
- With the doors closed, use a Phillips screwdriver to remove the screws from the top cover.

- Disconnect the wires and the water tube from the left door. First, decouple the coupler, and then disconnect the water tube by holding down one of the water line couplers.

- Gently draw up the clamp and pull it up to remove it. Do not use excessive force.

- Open the door by 90 degrees. While holding the door, pull up and remove the top hinge. Do not damage the wire connectors while removing the top hinge.

- Gently pull up the door vertically to remove it.
- Lay the door down on a flat surface.


Remove the right fridge door
- Gently draw up the clamp and pull it up to remove it. Do not use excessive force.
- Open the door by 90 degrees. While holding the door, pull up and remove the top hinge. Do not damage the wire connectors while removing the top hinge.
- Gently pull up the door vertically to remove it.

- Lay the door down on a flat surface.


Reattach the fridge doors
Follow the above steps in reverse order to reattach the fridge doors.
Remove the freezer drawer
- Lift up the front of the upper basket and pull it to remove it.

- Pull up the lower basket to remove it from the rail assembly.
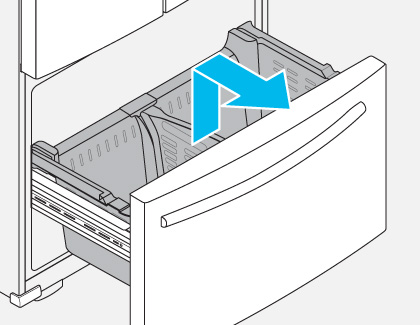
- Press down on the hooks to unlock the rail assembly.
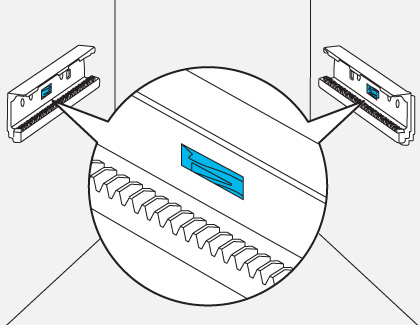
- While holding the upper area of the freezer drawer, slide the drawer out to remove the drawer from the rail assembly.
Note: Do not scratch or dent the rail assembly.


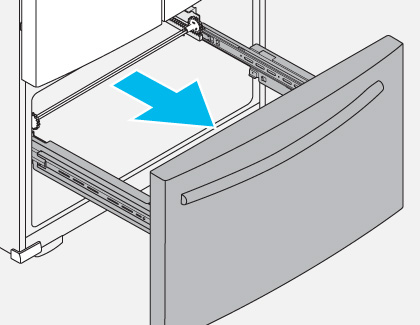
Reattach the freezer drawer
Follow the above steps in reverse order to reattach the fridge doors. Please mount the freezer baskets in the correct position. Otherwise, the door will not open or close properly, which may cause frost to build up.
Install/remove doors on top-freezer models
You can remove and reinstall the doors on a Samsung Top Freezer refrigerator model using the instructions in our guide.
Required tools:
- Phillips screwdriver
- Flat-head screwdriver
- Spanner (11mm)
- Socket wrench (8mm and 10mm)
- Allen wrench
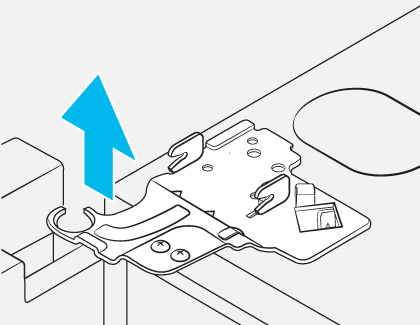
Remove the doors
- Use a Phillips screwdriver to loosen the screws on the top table. Then, gently pull out the top table.
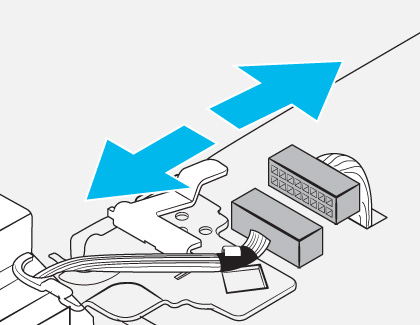
- Decouple the wire connectors.
- Loosen the bolts on the top hinge.
- Gently lift up the freezer door to remove it.
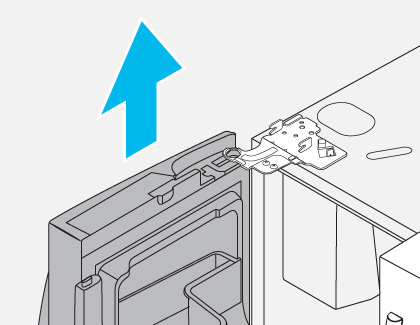
- Use a screwdriver and wrench to loosen the bolts and remove the middle hinge.
- Gently slide the fridge door out of the hinge shaft, and then pull up to remove the door.


Remove the hinge and door shaft
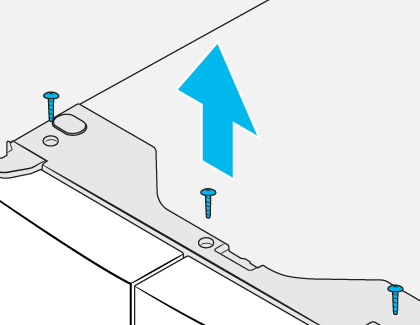
- Use a screwdriver to remove the screw on the bottom hinge.

- Use a screwdriver to remove the hinge bolt.
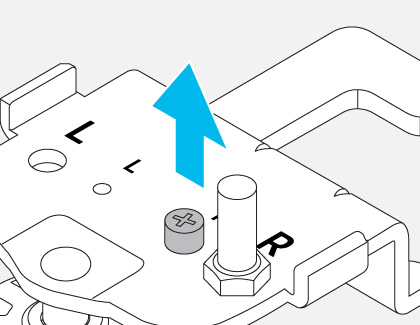
- Use a wrench to remove the door shaft.


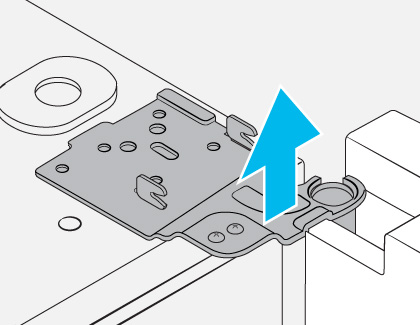
Remove the auto closer (freezer door only)
- Remove the auto closer and the stopper from the bottom of the fridge door. Reinsert the auto closer and stopper on the desired side.
- Use a flat-head screwdriver to remove the hinge grommet.
-2.jpg)
- Reinsert the hinge grommet on the desired side.
-3.jpg)
-2.jpg)
-3.jpg)
Remove the bar cover and top hinge
- Pull up to remove the bar cover on the top of the freezer door.
- Remove the top hinge with its cover.
- Separate the top hinge from the hinge cover.
- Arrange the door wire in the hinge cover.
- Remove the cap spacer and door shaft.


Reattach the doors
- Use a flat-head screwdriver to remove the middle-hinge screw cap, and then reinsert it on the desired side.
- Use a flat-head screwdriver to remove the flange-screw cap to reveal the flange screw.
- Use a Phillips screwdriver to remove the flange screw, and then tighten it on the desired side. Then, close the flange-screw cap.
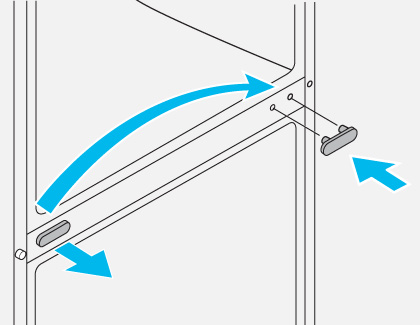
- Remove the grommet ring from the middle-hinge shaft, and then reinsert the ring on the other side of the shaft.
- Reverse the middle hinge and insert it on the desired side. Tighten the hinge.
- Use a flat-head screwdriver to remove both the hinge grommet and the hinge-hole cap. Reinsert them on their respective sides.
- Gently slide the fridge door into position.
- Gently slide the freezer door into position.


Reattach the remaining parts
- Insert the door shaft into the bottom hinge plate (from the top), and then tighten it securely.
- Insert the hinge bolt into the bottom hinge plate (from the top), and then tighten it securely.
- Position the bottom hinge plate on the desired side, and then use two screws to secure and attach the hinge plate.
- Insert and tighten the top hinge on the desired side.
- Detach the hinge cover from the top table.
- Arrange the door wire in the hinge cover, and then place the hinge cover onto the top hinge.
- Connect the wire connectors.
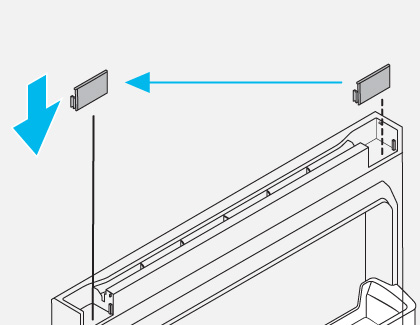
- Remove the hinge hole cap from the top table, and then reinsert it on the desired side.
- Insert the top table, and then attach it to the fridge.
- Insert the bar cover.


Contact Samsung Support


